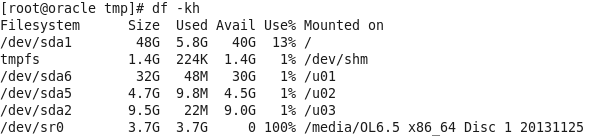
1. CHECKING MOUNT POINTS.
2. NEXT, VERIFY THAT YOUR SYSTEM HAS CORRECT HOSTNAME, STATIC IP ADDRESS AND DISTRIBUTION VERSION, USING FOLLOWING COMMANDS.
3. Edit the host file.:- If you’ve not set your system hostname, edit the system hosts file ‘/etc/hosts‘ and enter your hostname entry along with IP address as shown below.
Changing the Host name:-
Modify is /etc/sysconfig/network using vi tool and change the line that reads HOSTNAME=
Next, the /etc/hosts file needs to be changed. This is identical across all flavors and consists of using your favorite text editor and modifying the old hostname within. Such as from this:
Now let’s set it in stone. If you are using chkconfig and service commands (RedHat family folk, usually), you can simply type
#service network restart
which will restart the network with the new host name. The rest of you should be able to type
#/etc/init.d/network restart
to obtain the same results.
Then test again with the hostname command – you should get the new name returned.
Step 4 - Edit kernel parameters
Edit the file /etc/sysctl.conf and do the changes/add accordingly
fs.file-max = 6815744
kernel.sem = 250 32000 100 128
kernel.shmmni = 4096
kernel.shmall = 1073741824
kernel.shmmax = 4398046511104
net.core.rmem_default = 262144
net.core.rmem_max = 4194304
net.core.wmem_default = 262144
net.core.wmem_max = 1048576
fs.aio-max-nr = 1048576
net.ipv4.ip_local_port_range = 9000 65500
Step 5 - Run the following command to change the current kernel parameters
#sysctl -p
Step 6 - Limiting oracle processes
Edit Limits file - /etc/security/limits.conf
oracle soft nofile 4096
oracle hard nofile 65536
oracle soft nproc 2047
oracle hard nproc 16384
oracle soft stack 10240
oracle hard stack 32768
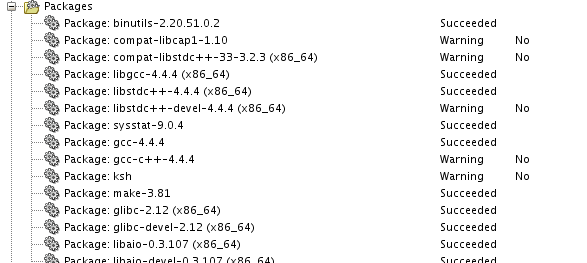
Step 7 - Install Dependencies
#yum install binutils -y
#yum install compat-libcap1 -y
#yum install compat-libstdc++-33 -y
#um install compat-libstdc++-33.i686 -y
#yum install gcc -y
#yum install gcc-c++ -y#yum install glibc -y#yum install glibc.i686 -y#yum install glibc-devel -y#yum install glibc-devel.i686 -y#yum install ksh -y#yum install libgcc -y#yuminstall libgcc.i686 -y#yum install libstdc++ -y#yum install libstdc++.i686 -y#yum installlibstdc++-devel -y#yum install libstdc++-devel.i686 -y#yum install libaio -y#yum installlibaio.i686 -y#yum install libaio-devel -y#yum install libaio-devel.i686 -y#yum installlibXext -y#yum install libXext.i686 -y#yum install libXtst -y#yum install libXtst.i686 -y#yum install libX11 -y#yum install libX11.i686 -y#yum install libXau -y#yum installlibXau.i686 -y#yum install libxcb -y#yum install libxcb.i686 -y#yum install libXi -y#yuminstall libXi.i686 -y#yum install make -y#yum install sysstat -y#yum install unixODBC -y#yum install unixODBC-devel -y
or
Step 8 - Add groups and users
groupadd -g 54321 oinstall
groupadd -g 54322 dba
groupadd -g 54323 oper
useradd -u 54321 -g oinstall -G dba,oper oracle
passwd oracle
Step 9 - Set SELINUX
Edit /etc/selinux/config file and set SELINUX=disabled
Step 10 - Stop Firewall
service iptables stop
chkconfig iptables off
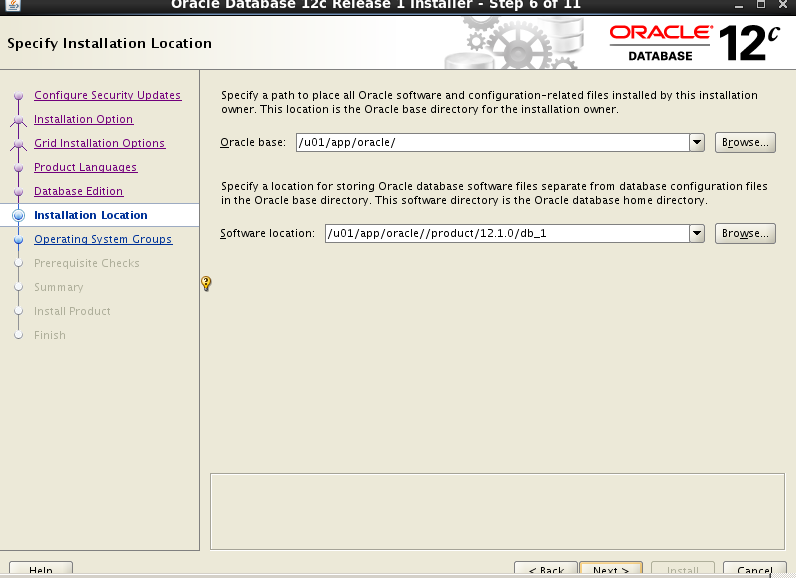
Step 11 - Create directories for oracle Installation
mkdir -p /u01/app/oracle/product/12.1.0/db_1
Change Ownership and give read write and executable permission
chown -R oracle:oinstall /u01/app/oracle/
chmod -R 775 /u01/
Step 12- Enable server access control program for X
#xhost + (run from root user)
Step 13 - Edit bash profile for oracle user /home/oracle/.bash_profile
# Oracle Settings
export TMP=/tmp
export TMPDIR=$TMP
export ORACLE_HOSTNAME=oracle
export ORACLE_UNQNAME=orcl
export ORACLE_BASE=/u01/app/oracle
export ORACLE_HOME=$ORACLE_BASE/product/12.1.0/db_1
export ORACLE_SID=orcl
export PATH=/usr/sbin:$PATH
export PATH=$ORACLE_HOME/bin:$PATH
export LD_LIBRARY_PATH=$ORACLE_HOME/lib:/lib:/usr/lib
export CLASSPATH=$ORACLE_HOME/jlib:$ORACLE_HOME/rdbms/jli
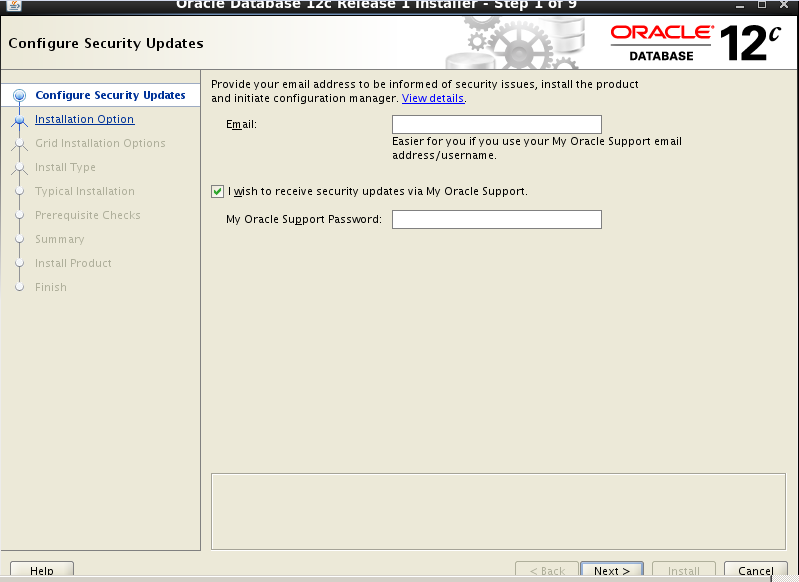
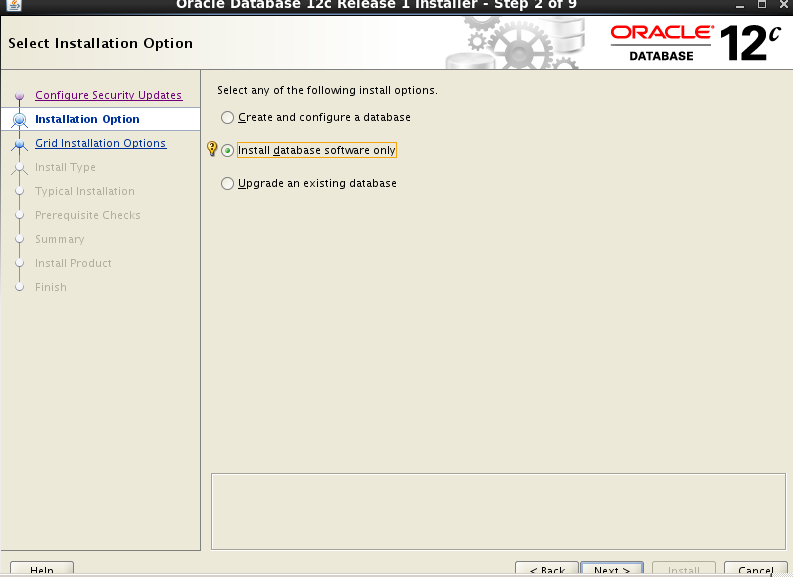
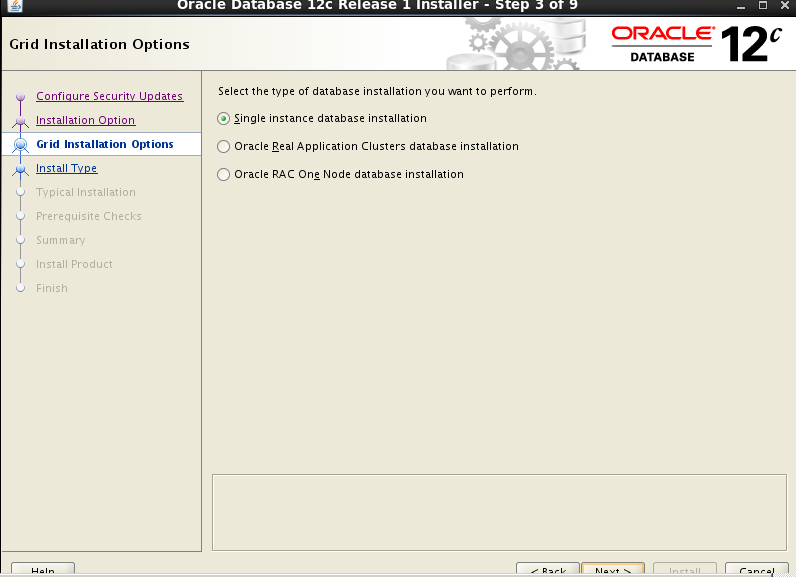
Step - 14 Start the Oracle Universal Installer
Go to the database directory created after extraction as shown in step 2. Run the Installer using the following command
1. $./runInstaller
PRVF-0002 : Could not retrieve local nodename
Issue:
While Oracle 12c Installation on Linux (my case OEL6 update 4) you could get an error.
Solution 1:
1. check hostname:
cat /etc/sysconfig/network | grep HOSTNAME
HOSTNAME = test.localdomain
2. check hosts:
cat /etc/hosts
127.0.0.1 localhost localhost.localdomain localhost4 localhost4.localdomain4
::1 localhost localhost.localdomain localhost6 localhost6.localdomain6
3. change /etc/hosts like:
127.0.0.1 test test.localdomain
::1 test test.localdomain
4. Run installer
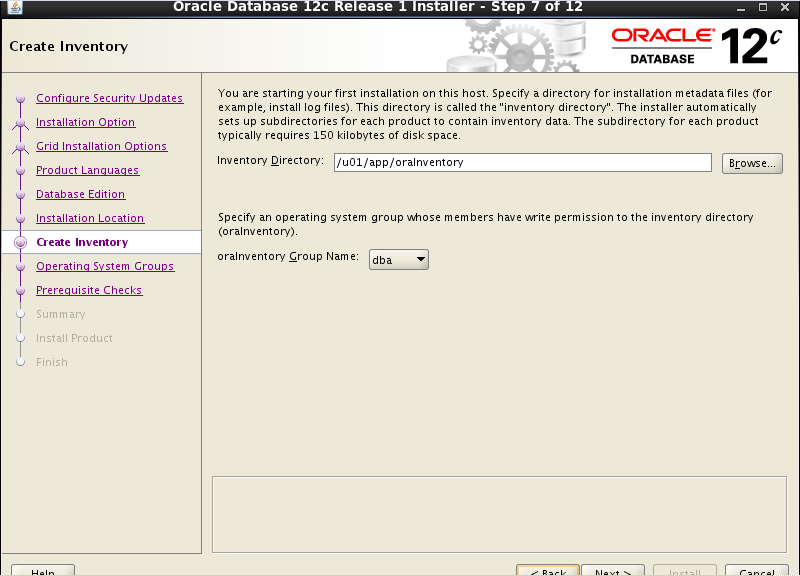
2.
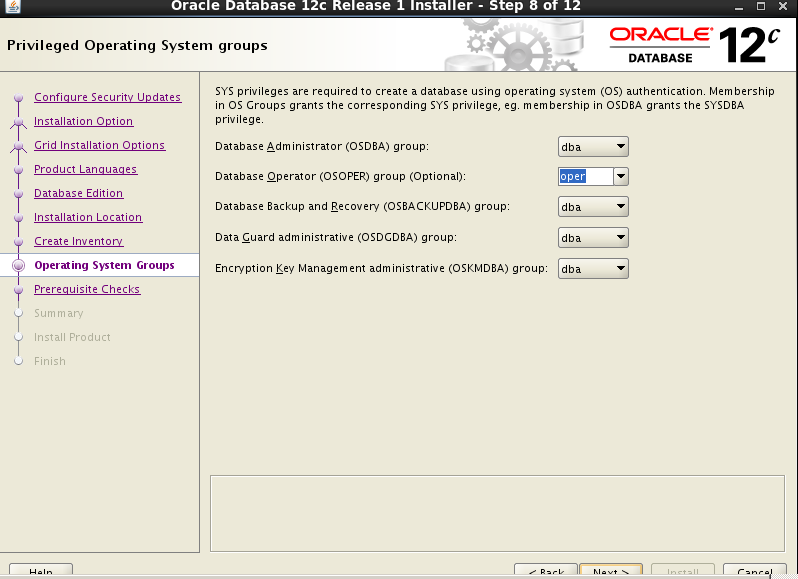
3.
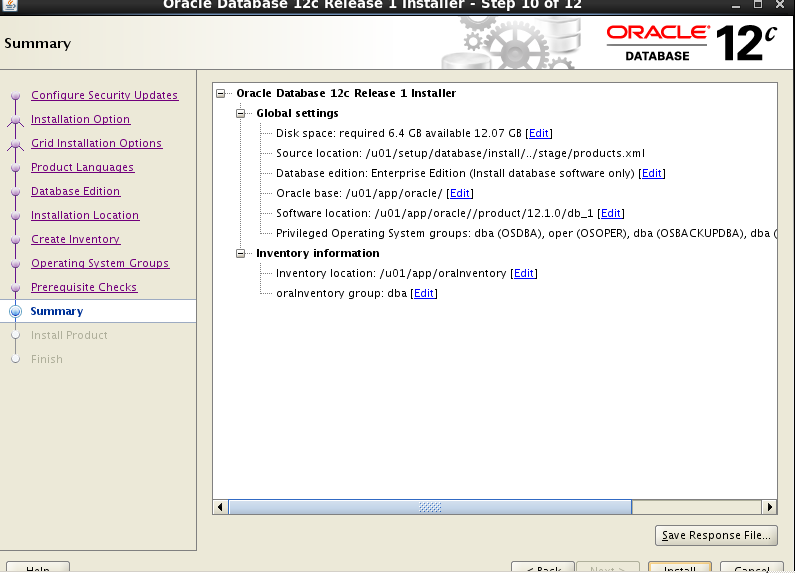
4.
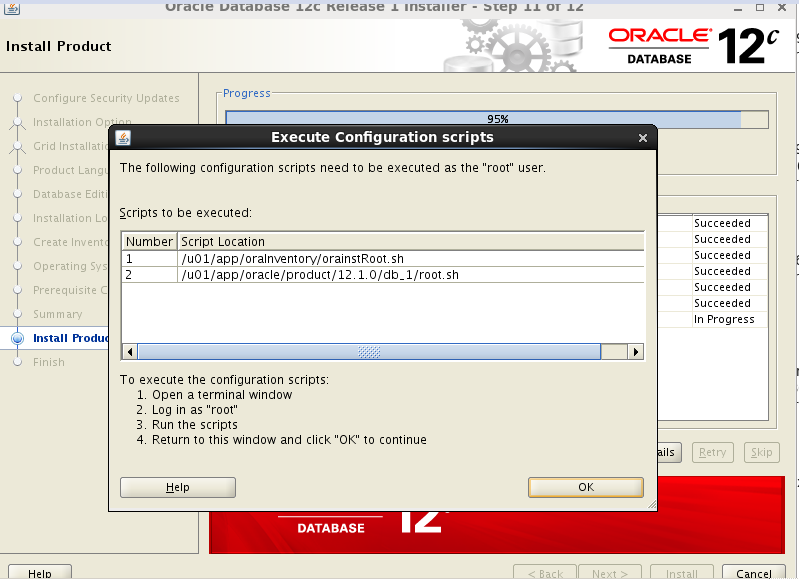
5.
6.
7.
8.
9.
10.
11.
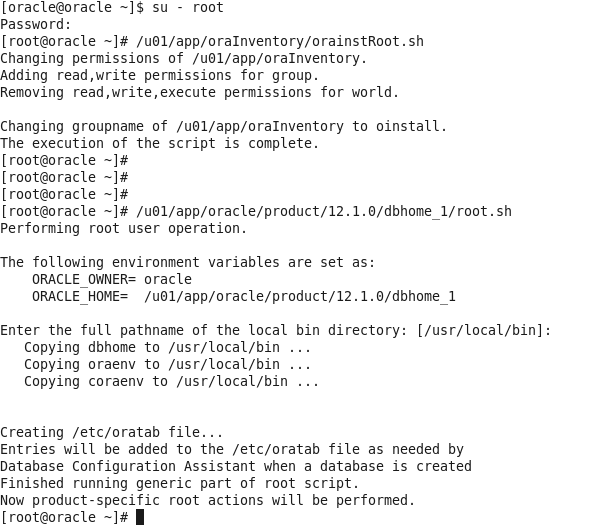
Post Installation
Edit the "/etc/oratab" file setting the restart flag for each instance to 'Y'
cdb1:/u01/app/oracle/product/12.1.0/db_1:Y